Elasticsearch 是一个实时的分布式搜索分析引擎,它能让你以前所未有的速度和规模,去探索你的数据。
“ELK”是三个开源项目的首字母缩写,这三个项目分别是:Elasticsearch、Logstash 和 Kibana。Elasticsearch 是一个搜索和分析引擎。Logstash 是服务器端数据处理管道,能够同时从多个来源采集数据,转换数据,然后将数据发送到诸如 Elasticsearch 等“存储库”中。Kibana 则可以让用户在 Elasticsearch 中使用图形和图表对数据进行可视化。
引用官网的一句话:
Elasticsearch 是一个分布式、RESTful 风格的搜索和数据分析引擎,能够解决不断涌现出的各种用例。 作为 Elastic Stack 的核心,它集中存储您的数据,帮助您发现意料之中以及意料之外的情况。
简介

ElasticSearch 的目录结构
| 目录 | 配置文件 | 描述 |
|---|
| bin | | 脚本文件,包括启动elasticsearch,安装插件,运行统计数据等 |
| config | elasticsearch.yml | 集群配置文件,user,role based 相关配置 |
| JDK | | java 运行环境 |
| data | path.data | 数据文件 |
| lib | | java 类库 |
| logs | path.log | 日志文件 |
| modules | | 包含所有ES模块 |
| plugins | | 包含所有已经安装的插件 |
安装 ELK7.12
官方文档 Set up Elasticsearch 有各个 OS 的安装指导,页面 Installing Elasticsearch 中提供了多种安装包对应的指导链接!
本文选择绿色安装包的的方式(tar.gz)安装。
- 安装环境: ubuntu 20.04
- 下载链接: 华为镜像站 速度能快一点
说明:ElasticSearch使用java语言开发,所以默认需要安装并配置JDK,设置 JAVA_HOME, 但是从 7.0 开始,ElasticSearch 内置了Java环境,无需再安装。另外ES启动不能使用root用户
内核参数修改(32C + 128G参考)
 1
 2
 3
 4
 5
 6
 7
 8
 9
10
11
12
13
14
15
16
17
18
19
20
21
22
23
24
| #修改文件描述符数量
grep "* - nofile 512000" /etc/security/limits.conf || echo "* - nofile 512000" >> /etc/security/limits.conf
#修改最大打开进程数数量
grep "work - nproc unlimited" /etc/security/limits.conf || echo "elasticsearch - nproc unlimited" >> /etc/security/limits.conf
#配合es mem lock,centos6无须添加
grep "* soft memlock unlimited" /etc/security/limits.conf || echo "* soft memlock unlimited" >> /etc/security/limits.conf
#配合es mem lock,centos6无须添加
grep "* hard memlock unlimited" /etc/security/limits.conf || echo "* hard memlock unlimited" >> /etc/security/limits.conf
#修改系统文件描述符
grep "fs.file-max = 1024000" /etc/sysctl.conf || echo "fs.file-max = 1024000" >> /etc/sysctl.conf
#修改程序最大管理的vm
grep "vm.max_map_count = 262144" /etc/sysctl.conf || echo "vm.max_map_count = 262144" >> /etc/sysctl.conf
grep "vm.min_free_kbytes = 2097152" /etc/sysctl.conf || echo "vm.min_free_kbytes = 2097152" >> /etc/sysctl.conf
grep "vm.zone_reclaim_mode = 0" /etc/sysctl.conf || echo "vm.zone_reclaim_mode = 0" >> /etc/sysctl.conf
sysctl -p
swapoff -a #关闭虚拟内存
|
1. 安装 elasticsearch
1
2
3
4
| wget https://artifacts.elastic.co/downloads/elasticsearch/elasticsearch-7.12.0-linux-x86_64.tar.gz
tar -xf elasticsearch-7.12.0-linux-x86_64.tar.gz -C ~
cd ~/elasticsearch-7.12.0
./bin/elasticsearch # 启动
|
启动成功后访问本地的 9200 端口,可以看到
 1
 2
 3
 4
 5
 6
 7
 8
 9
10
11
12
13
14
15
16
17
18
19
| $ curl 127.0.0.1:9200
{
"name" : "k8s-master",
"cluster_name" : "elasticsearch",
"cluster_uuid" : "sEn3TgEVSnW4kHpIAU1-5Q",
"version" : {
"number" : "7.12.0",
"build_flavor" : "default",
"build_type" : "tar",
"build_hash" : "78722783c38caa25a70982b5b042074cde5d3b3a",
"build_date" : "2021-03-18T06:17:15.410153305Z",
"build_snapshot" : false,
"lucene_version" : "8.8.0",
"minimum_wire_compatibility_version" : "6.8.0",
"minimum_index_compatibility_version" : "6.0.0-beta1"
},
"tagline" : "You Know, for Search"
}
|
如果有安装的错误,参考:
1
2
3
| 解决方法:elasticsearch.yml 配置
bootstrap.memory_lock: false
bootstrap.system_call_filter: false
|
- max file descriptors [4096] for elasticsearch process likely too low, increase to at least [65536]
1
2
3
| 解决方法:修改 /etc/security/limits.conf,配置:
hard nofile 80000
soft nofile 80000
|
- max virtual memory areas vm.max_map_count [65530] is too low
1
2
3
| 解决方法:修改 /etc/sysctl.conf,添加 :
vm.max_map_count = 262144
然后 sysctl -p 生效
|
安装插件方式:./bin/elasticsearch-plugin install analysis-icu
ES 相关配置
- 官网关于配置的内容主要有两处:
- Elasticsearch 主要有三个配置文件:
elasticsearch.yml:ES的配置文件 morejvm.options: ES JVM 参数 morelog4j2.properties: ES log 配置 more
默认情况,ES 告诉 JVM 使用一个最小和最大都为 4GB 的堆。但是到了生产环境,这个配置就比较重要了,确保 ES 有足够堆空间可用。
但是我的XPS 16G内存。不改堆内存大小的只能起一个实例,再起其他实例,旧的实例总显示 Killed。
修复方式,更改 ./config/jvm.options
运行多个Elasticsearch 实例
每个实例的配置文件需要不同,这里降低复杂度,不修改配置文件,而是直接用命令行的形式启动一个集群。
1
2
3
4
5
6
7
8
9
10
11
12
13
14
15
16
17
18
19
20
21
22
23
24
| # 启动实例1
./bin/elasticsearch -E cluster.name=myes -Enode.name=node0 \
-E node.master=true -E node.data=false -E node.ingest=false \
-E network.host=127.0.0.1 \
-E http.port=9200 -E transport.tcp.port=9300 \
-E discovery.seed_hosts="127.0.0.1:9300","127.0.0.1:9301","127.0.0.1:9302" \
-E cluster.initial_master_nodes="node0" -d
# 启动实例2
./bin/elasticsearch -E cluster.name=myes -E node.name=node1 \
-E node.master=true -E node.data=true -E node.ingest=false \
-E path.data=./data/data_node1 -E network.host=127.0.0.1 \
-E http.port=9201 -E transport.tcp.port=9301 \
-E discovery.seed_hosts="127.0.0.1:9300","127.0.0.1:9301","127.0.0.1:9302" \
-d
# 启动实例3
./bin/elasticsearch -E cluster.name=myes -E node.name=node2 \
-E node.master=true -E node.data=true -E node.ingest=false \
-E path.data=./data/data_node2 -E network.host=127.0.0.1 \
-E http.port=9202 -E transport.tcp.port=9302 \
-E discovery.seed_hosts="127.0.0.1:9300","127.0.0.1:9301","127.0.0.1:9302" \
-d
|
- 9300端口: ES节点之间通讯使用
- 9200端口: ES节点 和 外部 通讯使用
discovery.seed_hosts: 发现设置。有两种重要的发现和集群形成配置,以便集群中的节点能够彼此发现并且选择一个主节点.其中 discovery.seed_hosts 是组件集群时比较重要的配置,用于启动当前节点时,发现其他节点的初始列表。
当一个已经加入过集群的节点重启时,如果他无法与之前集群中的节点通信,很可能就会报这个错误 master not discovered or elected yet, an election requires at least 2 nodes with ids from。必须至少配置 [discovery.seed_hosts,discovery.seed_providers,cluster.initial_master_nodes] 中的一个。cluster.initial_master_nodes: 初始的候选 master 节点列表。初始主节点应通过其 node.name 标识,默认为其主机名。确保 cluster.initial_master_nodes 中的值与 node.name 完全匹配。
`cluster.initial_master_nodes` 该配置项并不是需要每个节点设置保持一致,设置需谨慎,如果其中的主节点关闭了,可能会导致其他主节点也会关闭。因为一旦节点初始启动时设置了这个参数,它下次启动时还是会尝试和当初指定的主节点链接,当链接失败时,自己也会关闭!
因此,为了保证可用性,预备做主节点的节点不用每个上面都配置该配置项!保证有的主节点上就不设置该配置项,这样当有主节点故障时,还有可用的主节点不会一定要去寻找初始节点中的主节点!
- 详细资料参考:
Bootstrapping a cluster
Discovery and cluster formation settings
在新版 7.x 的 ES 中,对 ES 的集群发现系统做了调整,不再有 discovery.zen.minimum_master_nodes 这个控制集群脑裂的配置,转而由集群自主控制,并且新版在启动一个新的集群的时候需要有cluster.initial_master_nodes 初始化集群主节点列表。如果一个集群一旦形成,你不该再设置该配置项,应该移除它。该配置项仅仅是集群第一次创建时设置的!集群形成之后,这个配置也会被忽略的!
discovery.seed_hosts: 提供群集中符合master节点资格的地址列表
node0 节点仅仅是一个 master 节点,它不是一个数据节点。
先启动 node0 节点,因为它设置了初始主节点的列表。这时候就可以使用 http://<host IP>:9200/ 看到结果了。然后逐一启动 node1 和 node2。通过访问 http://127.0.0.1:9200/_cat/nodes 查看集群是否 OK。
1
2
3
4
| $ curl 127.0.0.1:9200/_cat/nodes
127.0.0.1 42 49 58 4.45 2.09 1.37 lmr * node0
127.0.0.1 42 49 54 4.45 2.09 1.37 cdfhlmrstw - node1
127.0.0.1 42 49 45 4.45 2.09 1.37 cdfhlmrstw - node2
|
2. 安装 Kibana
1
2
3
4
| wget https://artifacts.elastic.co/downloads/kibana/kibana-7.12.0-linux-x86_64.tar.gz
tar -xf kibana-7.12.0-linux-x86_64.tar.gz
cd kibana-7.12.0-linux-x86_64
|
启动kibana
1
2
3
4
5
| # 将kibana改成中文
vim config/kibana.yml
i18n.locale: "zh-CN" ## 最后一行
./bin/kibana
|
访问本地的5601端口
查看样例。点击右下角的 try out sample data ,可以导入kibana的测试数据。分别是电商网站报表、航空数据、日志
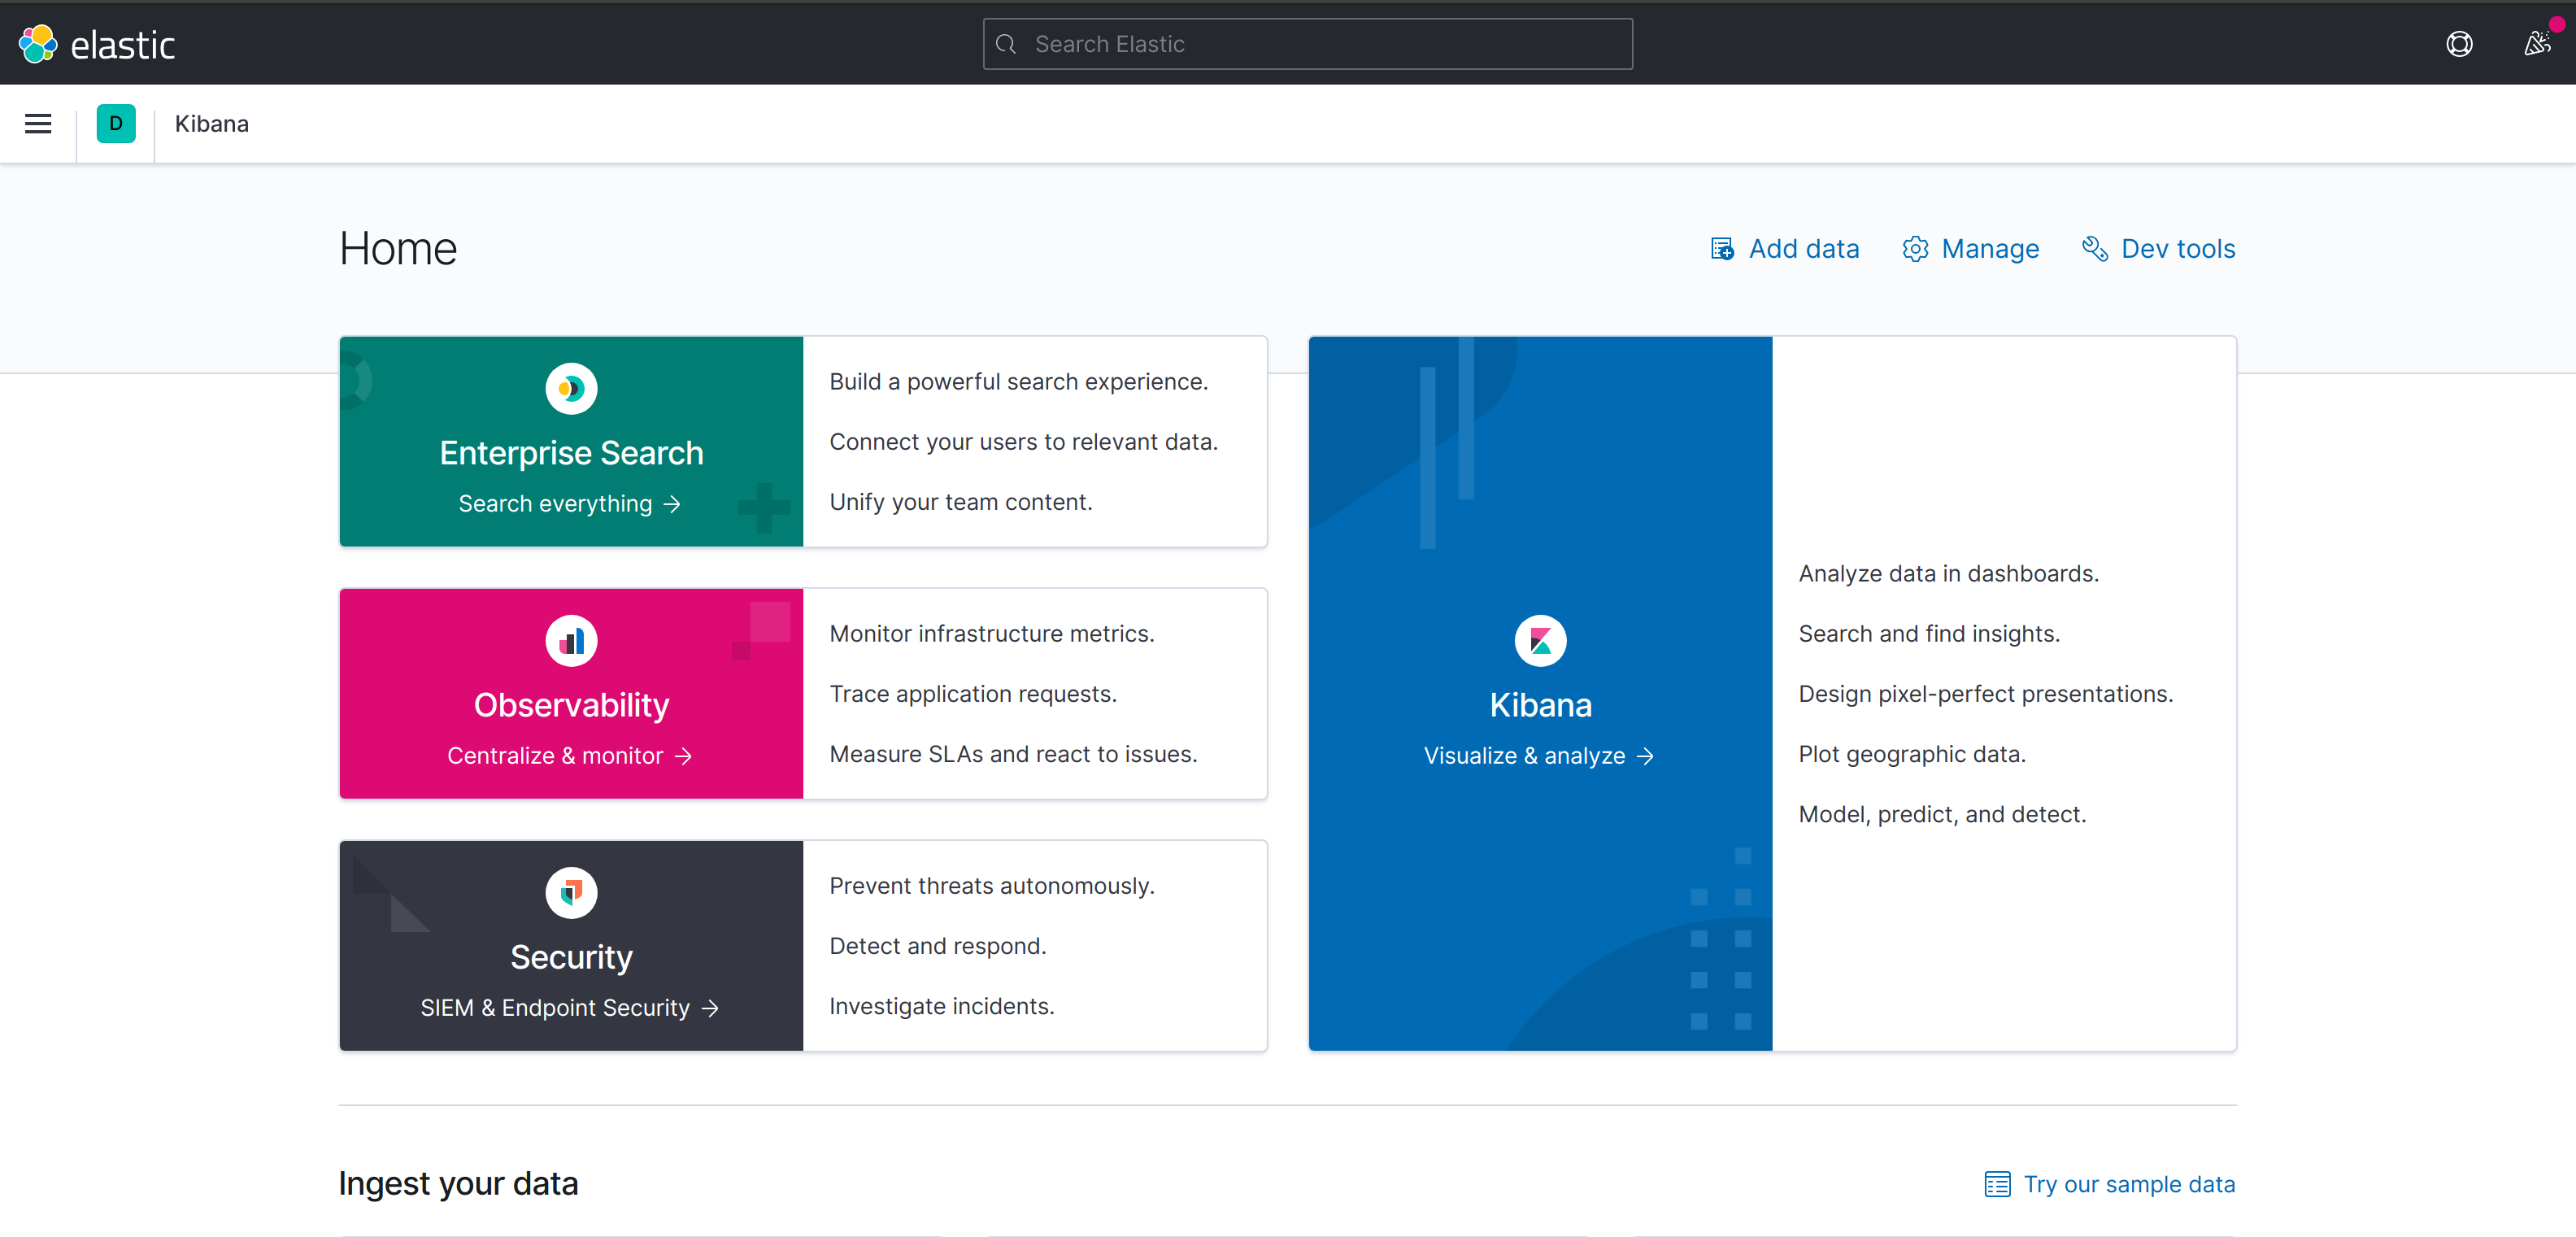 这里分 Enterprise Search(企业搜索)、Observability(监控)、Security(安全)
- Enterprise Search(企业搜索):可建立强大的搜索体验,当然是付费滴。
- Observability(监控):日志、APM、站点SLA监控、指标打点。(支持Nginx、MySQL、Redis等日志)
- Security(安全): 安全相关的解决方案
另外还开以打开 http://127.0.0.1:5601/app/dev_tools#/console 控制台,这个是直接对接 ES 的。可在这里直接使用查询语句。
3. 安装 Logstash
1
2
| wget https://artifacts.elastic.co/downloads/logstash/logstash-7.12.0-linux-x86_64.tar.gz
|
4. 安装 cerebro
cerebro是专业化项目管理系统,提供一个协作工作环境和项目管理软件,用于处理复杂的视觉材料。它
专为 CGI 和动画工作室、广告公司、电视公司和建筑设计公司而开发。也可以说它是一款Elasticsearch监控工具。
安装
1
2
3
4
5
| wget https://github.com/lmenezes/cerebro/releases/download/v0.9.3/cerebro-0.9.3.tgz
tar -xf cerebro-0.9.3.tgz
cd cerebro-0.9.3
./bin/cerebro # 启动
|
cerebro 需要 java 才能运行,没有java环境的化,可以执行 sudo apt install openjdk-11-jdk 。 Java 11 是 Java 的一个长期支持版本(LTS)。它同时也是 Ubuntu 20.04的默认 Java 开发和运行环境。
访问 http://127.0.0.1:9000 浏览器打开。
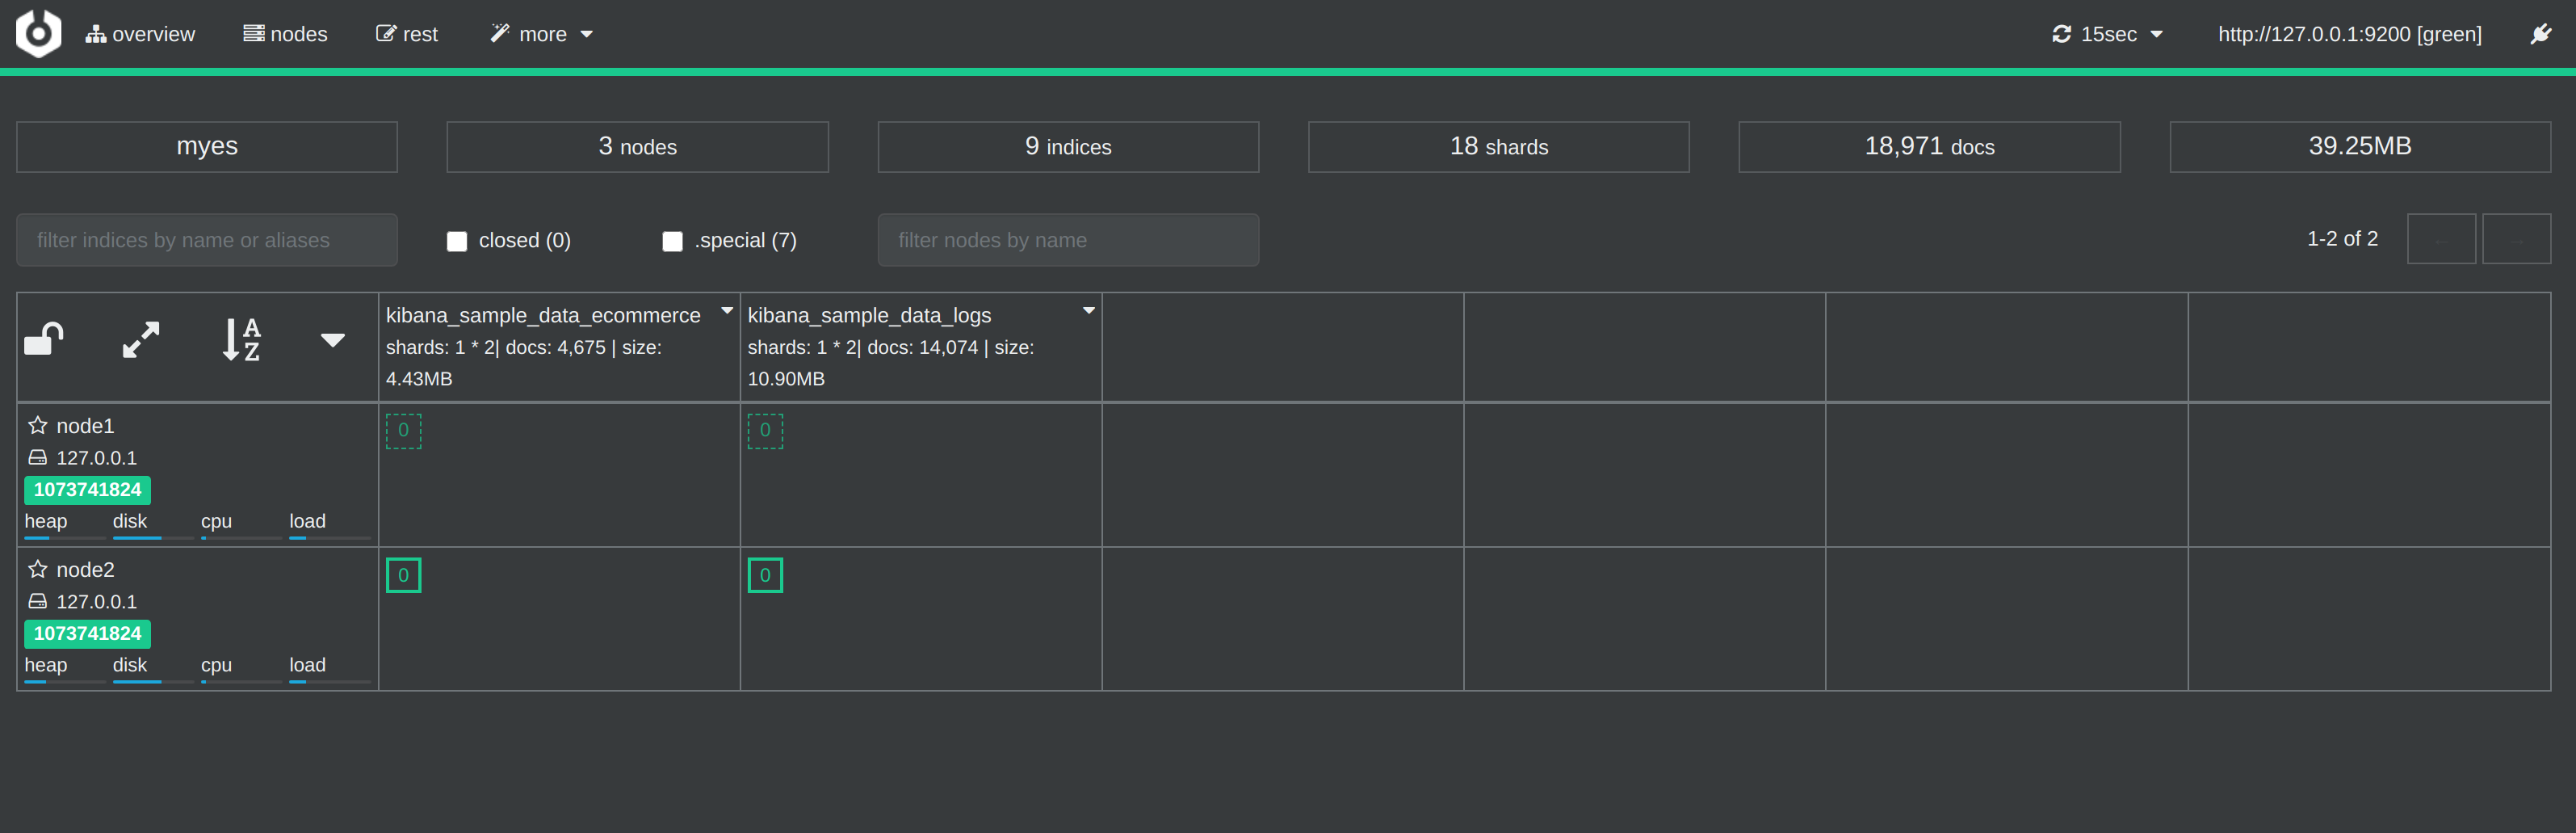
点击左上方 node,可查看节点情况。
4. 测试
下载测试样本 movielens
1
2
| wget http://files.grouplens.org/datasets/movielens/ml-20m.zip
unzip ml-20m.zip
|
开始配置文件
 1
 2
 3
 4
 5
 6
 7
 8
 9
10
11
12
13
14
15
16
17
18
19
20
21
22
23
24
25
26
27
28
29
30
31
32
33
34
35
36
37
38
39
40
41
42
| input {
file {
path => "/home/work/logs/ml-20m/movies.csv"
start_position => "beginning"
sincedb_path => "/dev/null"
}
}
filter {
csv {
separator => ","
columns => ["id","content","genre"]
}
mutate {
split => { "genre" => "|" }
remove_field => ["path", "host","@timestamp","message"]
}
mutate {
split => ["content", "("]
add_field => { "title" => "%{[content][0]}"}
add_field => { "year" => "%{[content][1]}"}
}
mutate {
convert => {
"year" => "integer"
}
strip => ["title"]
remove_field => ["path", "host","@timestamp","message","content"]
}
}
output {
elasticsearch {
hosts => "http://localhost:9200"
index => "movies"
document_id => "%{id}"
}
stdout {}
}
|
导入测试数据到ES中
logstash -f log.conf
进阶 8.2
elasticsearch 8.0 版本做了比较大的更新,尤其是在安全层面,默认开启安全配置,并极大简化了开启安全模式所需要的工作量。安装过程中的一些参数也发生了比较大的变化,这里再启用 8.0 的安全模式做一个补充。
部署还是采用单机启3个实例的模式,结构参照 上面。
8.x 版本的安全属性主要是由 X-pack 这个扩展插件提供,X-pack 为Elastic stack 提供扩展了警报,监控,报告,机器学习和许多其他功能,ES 8正是默认启动了该功能。
相关配置项
- xpack.security.enabled
默认为true,启用节点上ES的XPACK安全功能,相当于总开关
- xpack.security.http.ssl
用来开启https,以及对应的设置,整体配置项如下:
1
2
3
4
5
6
7
8
| xpack.security.http.ssl:
enabled: false 【开启还是关闭】
verification_mode: certificate【如下】
【full:它验证所提供的证书是否由受信任的权威机构(CA)签名,并验证服务器的主机名(或IP地址)是否与证书中识别的名称匹配。】
【certificate:它验证所提供的证书是否由受信任的机构(CA)签名,但不执行任何主机名验证。】
【none:它不执行服务器证书的验证。】
truststore.path: certs/elastic-certificates.p12 【信任存储库文件的存放位置】
keystore.path: certs/elastic-certificates.p12【密钥存储库文件的存放位置】
|
- xpack.security.transport.ssl
这个是传输层的认证设置,整体配置项如下:
1
2
3
4
5
6
7
8
| xpack.security.transport.ssl:
enabled: true【开启还是关闭】
verification_mode: certificate【如下】
【full:它验证所提供的证书是否由受信任的权威机构(CA)签名,并验证服务器的主机名(或IP地址)是否与证书中识别的名称匹配。】
【certificate:它验证所提供的证书是否由受信任的机构(CA)签名,但不执行任何主机名验证。】
【none:它不执行服务器证书的验证。】
keystore.path: certs/elastic-certificates.p12【信任存储库文件的存放位置】
truststore.path: certs/elastic-certificates.p12【密钥存储库文件的存放位置】
|
安全功能部署
「创建证书生成信息的存放路径」
8.2.3 必须将security放到 ES根目录的 ./config 下,否则报错:
org.elasticsearch.ElasticsearchSecurityException: failed to load SSL configuration [xpack.security.transport.ssl] - cannot read configured [PKCS12] keystore (as a truststore) [/home/ubuntu/data/elasticsearch-8.2.3/security/es-node1/es-node1.p12] because access to read the file is blocked; SSL resources should be placed in the [/home/ubuntu/data/elasticsearch-8.2.3/config] directory
Likely root cause: java.security.AccessControlException: access denied (“java.io.FilePermission” “/home/ubuntu/data/elasticsearch-8.2.3/security/es-node1/es-node1.p12” “read”)
没有读权限,莫名其妙的,搞不懂!😡
1
| mkdir -p ~/data/elasticsearch-8.2.3/config/security
|
「创建CA」
1
2
3
4
5
6
7
| ./bin/elasticsearch-certutil ca --ca-dn \
"CN=Elastic Certificate Tool Autogenerated CA" \
--days 3650 \
--out "./config/security/elastic-certificates.p12" \
--silent
Enter password for elastic-certificates.p12 :
|
「生成各节点传输层证书和私钥,用于节点间的发现和通信加密」
1
2
3
4
5
6
7
8
9
10
11
12
13
14
15
16
17
18
19
20
21
22
23
24
25
26
27
28
29
30
31
32
33
34
35
36
| $ vim ./config/security/instances.yml
instances:
- name: "CN=es-node1.kiosk007.top"
ip:
- "127.0.0.1"
filename: "es-node1"
- name: "CN=es-node2.kiosk007.top"
ip:
- "127.0.0.1"
filename: "es-node2"
- name: "CN=es-node3.kiosk007.top"
ip:
- "127.0.0.1"
filename: "es-node3"
# 生成证书,指定CA,配置证书密码为 transpasswd
$ ./bin/elasticsearch-certutil cert --silent \
--in "./config/security/instances.yml" \
--out "./config/security/certs.zip" \
--ca "./config/security/elastic-certificates.p12" \
--pass "transpasswd" --ca-pass "capasswd"
# 解压
$ unzip certs.zip
$ tree
security/
├── certs.zip
├── elastic-certificates.p12
├── es-node1
│ └── es-node1.p12
├── es-node2
│ └── es-node2.p12
├── es-node3
│ └── es-node3.p12
└── instances.yml
|
「生成个节点 HTTPS 证书」
(如果有中央CA,可以创建CSR申请中央CA的证书,此处使用自建CA)
1
2
3
4
5
6
7
8
9
10
11
12
13
14
15
16
17
18
19
20
21
22
23
24
25
26
27
28
29
30
31
32
33
34
35
36
37
38
39
40
41
42
43
44
45
46
47
48
49
50
51
52
53
54
55
56
57
58
59
60
61
62
63
64
65
66
67
68
69
70
71
72
73
74
75
76
77
78
79
80
81
82
83
84
85
86
87
88
89
90
91
92
93
94
95
96
97
| # 交互式生成 http 证书
$ ./bin/elasticsearch-certutil http --silent
## Elasticsearch HTTP Certificate Utility
## Do you wish to generate a Certificate Signing Request (CSR)?
# 是否生成 CSR,否(使用中央CA时选择 是)
Generate a CSR? [y/N]
## Do you have an existing Certificate Authority (CA) key-pair that you wish to use to sign your certificate?
# 是否使用已存在的 CA
Use an existing CA? [y/N]y
## What is the path to your CA?
# CA 路径
CA Path: ./config/security/elastic-certificates.p12
# CA 密码
Password for elastic-stack-ca.p12:
# 证书有效时间
For how long should your certificate be valid? [5y] 10y
# 是否为每个节点生成证书
Generate a certificate per node? [y/N]y
# 配置节点一信息
node #1 name: es-node1
## Which hostnames will be used to connect to es-1?
es-node1.kiosk007.top
You entered the following hostnames.
- es-node1.kiosk007.top
Is this correct [Y/n]
## Which IP addresses will be used to connect to es-node1?
127.0.0.1
You entered the following IP addresses.
- 127.0.0.1
Is this correct [Y/n]
## Other certificate options
Key Name: es-node1
Subject DN: CN=es-node1
Key Size: 2048
Do you wish to change any of these options? [y/N] # 选 N
Generate additional certificates? [Y/n] # 选 Y
# 配置节点二信息
node #2 name: es-node2
## Which hostnames will be used to connect to es-node2?
es-node2.kiosk007.top
You entered the following hostnames.
- es-node2.kiosk007.top
Is this correct [Y/n]
## Which IP addresses will be used to connect to es-node2?
127.0.0.1
You entered the following IP addresses.
- 127.0.0.1
Is this correct [Y/n]y
## Other certificate options
Key Name: es-node2
Subject DN: CN=es-node2
Key Size: 2048
Do you wish to change any of these options? [y/N] # 选 N
Generate additional certificates? [Y/n] # 选 Y
# 配置节点三信息
node #3 name: es-node3
## Which hostnames will be used to connect to es-node3?
es-node3.kiosk007.top
You entered the following hostnames.
- es-node3.kiosk007.top
Is this correct [Y/n]
## Which IP addresses will be used to connect to es-node3?
127.0.0.1
You entered the following IP addresses.
- 127.0.0.1
Is this correct [Y/n]
## Other certificate options
Key Name: es-node3
Subject DN: CN=es-node3
Key Size: 2048
Do you wish to change any of these options? [y/N]
Generate additional certificates? [Y/n]n
# 生成证书密码,此处使用 httppasswd
Provide a password for the "http.p12" file: [<ENTER> for none]
Repeat password to confirm:
# 生成证书路径
What filename should be used for the output zip file? [/home/ubuntu/data/elasticsearch-8.2.3/elasticsearch-ssl-http.zip]
|
「查看生成的证书」
1
2
3
4
5
6
7
8
9
10
11
12
13
14
15
16
17
18
19
20
21
22
23
24
25
26
27
28
29
| $ tree
.
├── certs.zip
├── elastic-certificates.p12
├── elasticsearch
│ ├── es-node1
│ │ ├── README.txt
│ │ ├── http.p12
│ │ └── sample-elasticsearch.yml
│ ├── es-node2
│ │ ├── README.txt
│ │ ├── http.p12
│ │ └── sample-elasticsearch.yml
│ └── es-node3
│ ├── README.txt
│ ├── http.p12
│ └── sample-elasticsearch.yml
├── es-node1
│ └── es-node1.p12
├── es-node2
│ └── es-node2.p12
├── es-node3
│ └── es-node3.p12
├── instances.yml
└── kibana
├── README.txt
├── elasticsearch-ca.pem
└── sample-kibana.yml
|
「密钥库配置」
注解: keystore可以看成一个放key的库,key就是公钥,私钥,数字签名等组成的一个信息。 truststore是放信任的证书的一个store truststore和keystore的性质是一样的,都是存放key的一个仓库,区别在于,truststore里存放的是只包含公钥的数字证书,代表了可以信任的证书,而keystore是包含私钥的。
1
2
3
4
5
6
7
8
9
10
11
| # 创建密钥库
$ ./bin/elasticsearch-keystore create
Created elasticsearch keystore in /home/ubuntu/data/elasticsearch-8.2.3/config/elasticsearch.keystore
# 存储传输层证书密码(此处为 transpoasswd)
$ ./bin/elasticsearch-keystore add xpack.security.transport.ssl.keystore.secure_password
$ ./bin/elasticsearch-keystore add xpack.security.transport.ssl.truststore.secure_password
# 存储http证书密码(此处为 httppasswd)
$ ./bin/elasticsearch-keystore add xpack.security.http.ssl.keystore.secure_password
$ ./bin/elasticsearch-keystore add xpack.security.http.ssl.truststore.secure_password
|
启动集群
 1
 2
 3
 4
 5
 6
 7
 8
 9
10
11
12
13
14
15
16
17
18
19
20
21
22
23
24
25
26
27
28
29
30
31
32
33
34
35
36
37
38
39
40
41
42
43
44
45
46
47
48
49
50
51
52
53
54
55
56
57
58
59
60
| # 启动实例1
./bin/elasticsearch -E cluster.name=kiosk-es -Enode.name=es-node1 \
-E path.data=/home/ubuntu/data/elasticsearch-8.2.3/data/data1 \
-E path.logs=/home/ubuntu/data/elasticsearch-8.2.3/logs/log1 \
-E http.port=9200 -E transport.port=9300 -E network.host=127.0.0.1 \
-E discovery.seed_hosts="127.0.0.1:9300","127.0.0.1:9301","127.0.0.1:9302" \
-E action.destructive_requires_name=true \
-E cluster.initial_master_nodes="es-node1","es-node2","es-node3" \
-E xpack.security.enabled=true \
-E xpack.security.enrollment.enabled=true \
-E xpack.security.http.ssl.enabled=true \
-E xpack.security.http.ssl.verification_mode=certificate \
-E xpack.security.http.ssl.keystore.path=/home/ubuntu/data/elasticsearch-8.2.3/config/security/elasticsearch/es-node1/http.p12 \
-E xpack.security.http.ssl.truststore.path=/home/ubuntu/data/elasticsearch-8.2.3/config/security/elasticsearch/es-node1/http.p12 \
-E xpack.security.transport.ssl.enabled=true \
-E xpack.security.transport.ssl.verification_mode=certificate \
-E xpack.security.transport.ssl.keystore.path=/home/ubuntu/data/elasticsearch-8.2.3/config/security/es-node1/es-node1.p12 \
-E xpack.security.transport.ssl.truststore.path=/home/ubuntu/data/elasticsearch-8.2.3/config/security/es-node1/es-node1.p12 \
-d
# 启动实例2
./bin/elasticsearch -E cluster.name=kiosk-es -E node.name=es-node2 \
-E path.data=/home/ubuntu/data/elasticsearch-8.2.3/data/data2 \
-E path.logs=/home/ubuntu/data/elasticsearch-8.2.3/logs/log2 \
-E http.port=9201 -E transport.port=9301 -E network.host=127.0.0.1 \
-E discovery.seed_hosts="127.0.0.1:9300","127.0.0.1:9301","127.0.0.1:9302" \
-E action.destructive_requires_name=true \
-E cluster.initial_master_nodes="es-node1","es-node2","es-node3" \
-E xpack.security.enabled=true \
-E xpack.security.enrollment.enabled=true \
-E xpack.security.http.ssl.enabled=true \
-E xpack.security.http.ssl.verification_mode=certificate \
-E xpack.security.http.ssl.keystore.path=/home/ubuntu/data/elasticsearch-8.2.3/config/security/elasticsearch/es-node2/http.p12 \
-E xpack.security.http.ssl.truststore.path=/home/ubuntu/data/elasticsearch-8.2.3/config/security/elasticsearch/es-node2/http.p12 \
-E xpack.security.transport.ssl.enabled=true \
-E xpack.security.transport.ssl.verification_mode=certificate \
-E xpack.security.transport.ssl.keystore.path=/home/ubuntu/data/elasticsearch-8.2.3/config/security/es-node2/es-node2.p12 \
-E xpack.security.transport.ssl.truststore.path=/home/ubuntu/data/elasticsearch-8.2.3/config/security/es-node2/es-node2.p12 \
-d
# 启动实例3
./bin/elasticsearch -E cluster.name=kiosk-es -E node.name=es-node3 \
-E path.data=/home/ubuntu/data/elasticsearch-8.2.3/data/data3 \
-E path.logs=/home/ubuntu/data/elasticsearch-8.2.3/logs/log3 \
-E http.port=9202 -E transport.port=9302 -E network.host=127.0.0.1 \
-E discovery.seed_hosts="127.0.0.1:9300","127.0.0.1:9301","127.0.0.1:9302" \
-E action.destructive_requires_name=true \
-E cluster.initial_master_nodes="es-node1","es-node2","es-node3" \
-E xpack.security.enabled=true \
-E xpack.security.enrollment.enabled=true \
-E xpack.security.http.ssl.enabled=true \
-E xpack.security.http.ssl.verification_mode=certificate \
-E xpack.security.http.ssl.keystore.path=/home/ubuntu/data/elasticsearch-8.2.3/config/security/elasticsearch/es-node3/http.p12 \
-E xpack.security.http.ssl.truststore.path=/home/ubuntu/data/elasticsearch-8.2.3/config/security/elasticsearch/es-node3/http.p12 \
-E xpack.security.transport.ssl.enabled=true \
-E xpack.security.transport.ssl.verification_mode=certificate \
-E xpack.security.transport.ssl.keystore.path=/home/ubuntu/data/elasticsearch-8.2.3/config/security/es-node3/es-node3.p12 \
-E xpack.security.transport.ssl.truststore.path=/home/ubuntu/data/elasticsearch-8.2.3/config/security/es-node3/es-node3.p12 \
-d
|
这样启动比较晕😵的是,所有的命令行最好都带上这些 -E 选项,比如我想要改 elastic 用户的密码,应该这样做。。
1
| ./bin/elasticsearch-reset-password -u elastic -E cluster.name=kiosk-es -Enode.name=es-node1 -E path.data=/home/ubuntu/data/elasticsearch-8.2.3/data/data1 -E path.logs=/home/ubuntu/data/elasticsearch-8.2.3/logs/log1 -E http.port=9200 -E transport.port=9300 -E network.host=127.0.0.1 -E discovery.seed_hosts="127.0.0.1:9300","127.0.0.1:9301" -E action.destructive_requires_name=true -E cluster.initial_master_nodes="es-node1","es-node2" -E xpack.security.enabled=true -E xpack.security.enrollment.enabled=true -E xpack.security.http.ssl.enabled=true -E xpack.security.http.ssl.verification_mode=certificate -E xpack.security.http.ssl.keystore.path=/home/ubuntu/data/elasticsearch-8.2.3/config/security/elasticsearch/es-node1/http.p12 -E xpack.security.http.ssl.truststore.path=/home/ubuntu/data/elasticsearch-8.2.3/config/security/elasticsearch/es-node1/http.p12 -E xpack.security.transport.ssl.enabled=true -E xpack.security.transport.ssl.verification_mode=certificate -E xpack.security.transport.ssl.keystore.path=/home/ubuntu/data/elasticsearch-8.2.3/config/security/es-node1/es-node1.p12 -E xpack.security.transport.ssl.truststore.path=/home/ubuntu/data/elasticsearch-8.2.3/config/security/es-node1/es-node1.p12
|
启动Kibana
别忘了带上上面说的一堆 “-E” 选项
1
| ./bin/elasticsearch-reset-password -u kibana_system
|
得到 kibana_system 用户的密码后,将内容填进 ./config/kibana.yml 配置文件中,大概 42-51 行
1
2
3
4
5
6
7
8
9
10
11
| # =================== System: Elasticsearch ===================
# The URLs of the Elasticsearch instances to use for all your queries.
elasticsearch.hosts: ["https://es-node1.kiosk007.top:9200","https://es-node2.kiosk007.top:9201"]
# If your Elasticsearch is protected with basic authentication, these settings provide
# the username and password that the Kibana server uses to perform maintenance on the Kibana
# index at startup. Your Kibana users still need to authenticate with Elasticsearch, which
# is proxied through the Kibana server.
elasticsearch.username: "kibana_system"
elasticsearch.password: "_pSr-80lrixxxxxxxxxxx" # 上一步得到的密码
|
这里填写的是域名 es-node1.kiosk007.top,可以本地写个 hosts,将流量指向本地,主要原因是证书认证是看域名的,写127.0.0.1 或者 localhost 证书认证都过不了
因为 Kibana 访问 Elasticsearch 需要通过证书的方式,然而我们的CA是自签证书,默认当然无法认证成功。我们的CA证书是 ./config/security/elastic-certificates.p12
kibana 不能够直接使用 PKCS#12类型的证书!
kibana 不能够直接使用 PKCS#12类型的证书!
kibana 不能够直接使用 PKCS#12类型的证书!
那么需要我们先转一次,将 pkcs12 中的证书部分转换成 pem 格式。
1
| openssl pkcs12 -in elastic-certificates.p12 -clcerts -nokeys -chain -out elasic-certificates.pem
|
将ca 证书的存储路径填写到 kibana 的配置文件中,大概在93行
1
2
3
4
5
| # Enables you to specify a path to the PEM file for the certificate
# authority for your Elasticsearch instance.
#elasticsearch.ssl.certificateAuthorities: [ "/path/to/your/CA.pem" ]
elasticsearch.ssl.certificateAuthorities: [ "/home/ubuntu/data/elasticsearch-8.2.3/config/security/elasic-certificates.pem" ]
|
配置完成之后,恭喜你,完成了!!
哦,对了,登陆用户是 elastic ,密码不知道了可以用 ./bin/elasticsearch-reset-password -u elastic 重新生成一个。